Wednesday, October 3, 2012

Mercury Glass Lamp DIY After

Now I have to preface this post, I like the mercury glass that has some two tones and holes here and there. So I used both silver paints from Krylon. I used the Metallic Brilliant silver and the Looking Glass Mirror like paint. I also had to do the outside not the inside because of the shape of the lamp.
  • Step one: clean the lamp and cover all electrical parts.
  • Step two: spray the Brilliant silver in spots around the lamp not the whole thing, just 4-5 areas 3 inches wide. When I got too much in an area I used the citrus paint remover and took it back in areas. Then rinsed with a hose.(do all spraying outside if possible)
  • Step Three: spritz some water from a sprayer in the areas you want to paint with the Looking glass paint, don't spritz too lightly. Get enough blobs of water and only do a 3 inch area at a time.
  • Step Four: in short bursts spray over them with the Looking glass paint then blow on it to dry with your mouth.
  • Step Five: use a paper towel to remove the water bubbles and flatten the paint as soon as it's dry which is after you stop blowing. If the bubbles are left you don't get the same affect.
  • Step Six: repeat for the rest of the lamp. Don't seal the application is pretty strong and won't scratch easily.
 
So here is the finished lamp, I'm still working on the shade.


I really like how it turned out and would recommend getting a cheap glass vase at a thrift store to practice on first. Just do a couple areas and then go to the lamp. I also think most people might like just the Looking glass paint instead of both. I used a 40% off coupon from Hobby Lobby for the paint.


Sunday, September 23, 2012

DIY Mercury Glass Lamp Before


I found this little lovely at a thrift shop a couple weeks ago. I have wanted a mercury glass lamp forever. I have pieces throughout my house and love the stuff. Most mercury glass lamps are pretty pricey and if they are not I don't care for the shape. I found this for $8.00. It's pretty heavy and I liked the shape a lot. Now most DIY for mercury glass have you painting the inside. As you can see that isn't possible for this lamp. So I have to find a different way to accomplish what I want. I also plan on updating the shade but, using the same one. I have a couple ideas rolling around my head. I have a ton of fabric stashed away and may use some of it to repurpose this shade. I'll do the reveal soon so check back!

Wednesday, September 12, 2012

Re-purposing Thrift store Finds

I tend to be a pretty thrifty person and love to hit garage sales and consignment shops. Beads and finding are getting up there in price so I always keep an eye out for items I can re-purpose. I found a long beaded necklace that was about $5.00 at goodwill about a month ago. I liked the individual beads but wouldn't wear the necklace myself. I took the piece apart and created a memory bracelet for a relative for Christmas.

I added a couple elements that weren't in the original piece but also made two other pieces for a gift and have more beads left. The necklace had a lot of very distinctive beads to use.
This is a great way to be green and save money. The memory wire goes along way and I have several more bracelets that I will be making off of this package. So for about nine dollars so far I've made 3 pieces and could use the left over beads to make several sets of earrings. When using memory wire don't use your regular jewelry cutters. They will be damaged by them so I just used regular metal cutters from the garage and filed the end if needed and turned the end into a loop.

Monday, September 3, 2012

My Son's 3 Yr Birthday Cake

My son is really into Buzz Lightyear and I wanted to try my hand at it for his birthday. All of the mixing to get the colors right was a real pain but, it came together. Unbeknownst to my guests I had forgoten to add the milk to the cake so it was a dense almost brownie like cake. Really, really good but so rich because I had also added chocolate chips. I bought the black icing which I find to be better and easier than trying to mix it myself.  I have one of the ball cake pans that you can make basketballs or soccor etc. out of. I have seen it made into a pumpkin and may do one for Halloween and I have a tree and I think a church also. I had bought a lot of these pans a couple years ago at a garage sale. I re-sold the ones I didn't think I would use and kept the others. If you use one of these pans, really oil and flour it so the cake releases easily. I also recommend having double cardboard under the cake to keep it level. My DH held the sides too far apart and craqcked the cake. Wouldn't you know we ate it anyway! LOL

Tuesday, August 28, 2012

Scrapbook Organizing Technique for Jewelry Projects

Have you ever heard the phrase "creative people are seldom tidy?" That phrase sums me up to a "T." Try as I might to keep my work area clean it always ends up like this.
I just get so excited about this or that and drag out a couple things to go with it. Then I see something else and do the same thing. Before I know it I have several projects going and the whole table it wiped out.
I have so much stuff I forget what I have. But I have a hard time not buying new stuff, hence the little cheetah bag in the back of the table. At least some of the beads and findings are organized and this is a recent thing. I guess my next project is to just clean the table AGAIN.
 I think I may employ a little scrap booking trick to my half done projects. I used to get the pictures together and sorted for the ones I wanted on each page. Then I would get the background and other elements I wanted to go with it. Finally I would put them in a sleeve or folder to hold till I could get to them. So off the the dollar store I go to get some nice cheap containers to hold projects in progress.
 See, I always want to shop!


Wednesday, August 22, 2012

Repurposed Spice rack

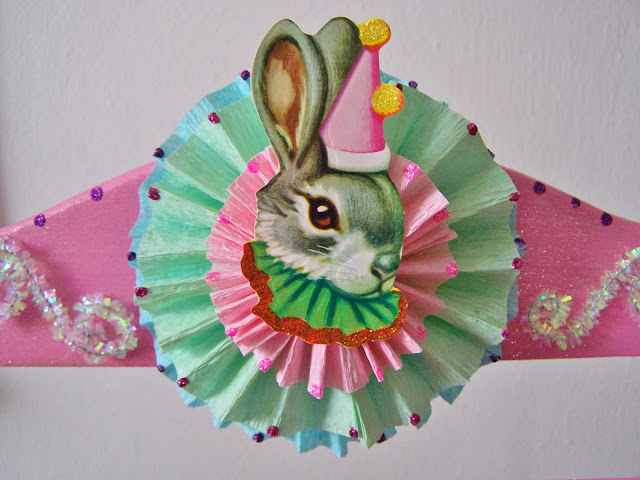
I have a ton of glitters and really wanted something to display them on. When I was out thrifting one day I found this old spice rack. I re-painted it with some hot pink paint then used spray glitter in silver all over it.
 I love circus themed stuff and had this cute victorian scrap bunny in a party hat that a wonderful blog hopper sent to me. I put them all together and am so happy with the results. I still need to take the time and hang it, then filler up. In reality I could use about 4 of these for all of my glitter, don't judge. So here is the result.
I need to glue the top streamers in place a little better. It has been so hot hear I've been running my swamp cooler constantly so the humidity made the streamers a little saggy. The little wheels are the caps I saved from my sons smoothie pouches we use in emergencies. Don't they really look like wheels? My dear husband just shakes his head at me because of what I save. The purple circles above are vintage snap on earrings repurposed.


Thursday, August 16, 2012

Sparrow Bracelet

I've been experimenting with a lot of bracelets lately. I really love how this one turned out. I have collected tons of findings and components and really need to make a lot of pieces and start selling more of my work. I am trying to simplify more and I hate to just destash everything. I would really like to keep it all but, I find that I wear just a few items. Right now selling is the best thing I guess. I am very drawn to the birds in art and jewelry. I also am starting to work in more of the shiny and antiqued combo pieces like this one and with the brass and silver. I recently went to Monte Vista here in Colorado. I checked out a bead store there and bought a couple things and am in the middle of a project I'll share next couple posts. I've been trying to create jewelry in ways I haven't in the past and trying to use elements that I've never used before. As of yet I still don't have a "style" like a lot of people. I like such diverse things that I don't know how to stick to one style.

My Birthday is coming up soon and my husband keeps asking me what I would like. I have finally decided (I think) that I would like a flex shaft. If you've never heard of one you can check them out at Rio Grande or Contenti. I think it would enable me to do more with metal.

Monday, August 13, 2012

Time Flies

I know it's been a long time since my last post. I had to focus on my health and that took a lot of reading and searching for answers. Also we had several close family members sick and that took up a whole bunch of time. So, I'm back! I went to the Cherry Creek Art Festival last month and got some awesome pics to share. I have a favorite artist that I love to see each time. Her name is Claudia Roulier if you've never seen her stuff your gonna love the next couple pics.


I love how whimsical everything is and the layers are amazing. She had a bear in a party hat the year before last riding a tricycle. I wanted that picture so much, alas was unable to afford it. But each year she has new cards made with her current work and I get them when I can and tuck them away for inspiration and awe.
I believe this was the poster for the year. This artist has some really fun stuff, sorry I can't remember who he is. The next couple pics are from unknown artists.


I love all of the mixed media art and assemblage. The third one up is all toys etc all painted black I thought it was very interesting, my husband didn't get it. He loves the photographs of landscapes and the realistic paintings. As you have probably noticed I don't have pics of those. They just don't move me. I've been making some jewelry lately and will post soon on those.